First day in the slope this year? 5 things to do

It’s time to finally get back to what we love best: telemark. You’ve train for three months to be ready for this?

This time of the year, we usually hit the local ski area for a few warm up runs. The snow quality and quantity might not be excellent but, hey, we go anyhow.

here’s my to do list for that big day:

1. A few days before, gather all equipment and inspect it carefully

I know you say: it was all good last year, why check it? First, make sure you find everything back.

A quick inspection will make you feel confident on the first run. Are your boots still comfortable? all buckles good? any mouse ate your Powerstrap (has happened to me!)? Are your bindings well screwed? (just tight them back with a screwdriver, if nothing moves, good, if it does, see your ski tech) Make sure the bindings are still adjusted perfect. Check your skins (clean, glue, straps…) Check that your adjustable poles still adjust (ask my friend Piteur, who came to me for is ski test for a job as ski patrol and could’t get is pole to move. I almost turned him back!) Check your helmet, your goggles, and of course check your skis (base, edges and chips, cracks…)

2. If you got new equipment, make sure everything is well adjusted to you.

Boots are the most important. Liners can be molded, Cuff alignment (canting angle) can be changed, forward lean is also available on certain models. More and more people buy their gear online, make sure you read your boot manual, search the web and ask questions.

Bindings need to be adjusted to your boots. This is much more simpler than on alpine gear. Again read manuals and search the web. Good tension on the cable is key to safety and performance.

If you need to install a binding, I strongly suggest caution on who you trust with this. Telemark bindings have much more stress on each screws than alpine binding (that’s why most brand have increased to 6 the total of screws on their binding). Also, on a lot of alpine gear, the binding are set on rail tracks which don’t require mounting. It seems fewer technicians are good at mounting bindings these days. You can mount bindings yourself, it isn’t so hard. But if the job is not 100% perfect, you might rip the binding from the ski somewhere through this season.

Check everything else, like jacket, underwear, socks, kneepads… Name it, if it’s new, make sure everything is dialed perfect.

3. the Big day, what to expect

Check weather report, check your ski area report, and check avalanche report. If backcountry is not your goal on the first day, make a habit to check avi reports anyway, it will give you an idea of the season’s coming. The start of the season can be crucial for snowpack stability trough out the season, just check the 2012-2012 Utah backcountry review.

4. There it is, your first run.

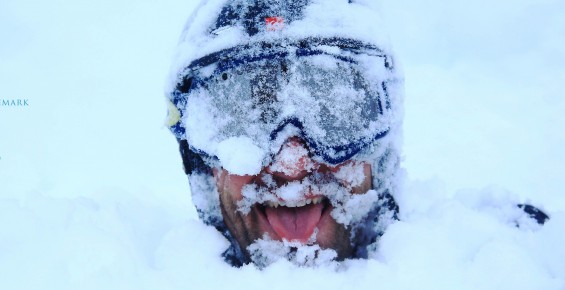
Make sure you warm up before going down on your skis. I know, it look silly, but I’ve never seen a pro skier not warm up before going down. On your first run, take it easy, and take an easy run for your level. Dial your balance, play around with different turn shape, telemark, alpine, stop on both side and so on. I always like to telemark fakie or backwards from the get go. This is something easy for me and it help me gain confidence. It is normal to feel a bit awkward at first but just enjoy the moment.

Telemark skiing, like any technical sport, is all in our head. And our head don’t remember the movement as good if it hasn’t practice for a few months…

5. Progress

Don’t wait for Christmas to get better. If you’ve train this fall, if you’ve check your gear, if the snow is good, if all is in place, do what is necessary to go towards your season’s goals right now

Here are my goals for the season:

  1. a 360° cab. (start and land backwards)
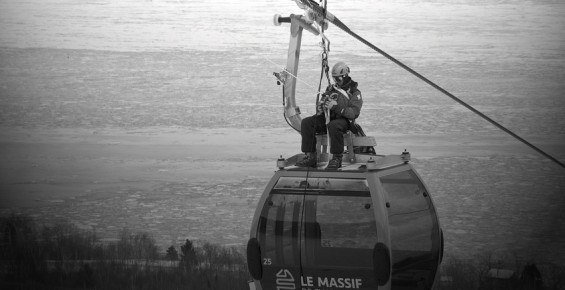
  2. Hand plant on our new wall at Le Massif
  3. Improve my carving (which I’ve negleted the last few years for tree skiing and bumps)

What are your goals on telemark this season?

video of telemark bumps

video of telemark tree skiing

Feels free to leave comments below…

Telemark turn, weak side

Like most everything, we have a strong side.

Snowboard is a good example. You have to choose between regular or goofy stance. In fact you don’t choose, it just happens to be that way.

Telemark turn is the same, remember when you started, you had a strong side. Maybe you don’t even remember. Now, mechanically, you may approach difficult situations on your strong side.

Like mentioned in the post: Flawless method to learn movement, practicing your weak side as you learn will only take a few more minutes and will just make it easier to learn on your good side. But what if you never learned something on your weak side and you got real good at it on your strong side. Can you still make it up for the time lost? Will it take incredible amount of time and energy the make it back? probably the answer to all these is YES.

Even if it will seem longer now, it’s still feasible and definitely worth the effort.

You know the saying:

If it ain’t broken don’t fix it. BS. This is a a loser’s perspective.

I think it’s more something like:

Be a visionary: Think outside the box.

Let’s take for example an advanced telemark skier that can ski any run on a resort. You sometime get air of jumps, landing telemark stance. Are you able to land both side equally well? Meaning: can you land with your left leg up front the same as you can your right? Probably not.

And it has a major impact on your ability to ski. Here’s how:

Going down a black diamond run with moguls is still hard but you manage. Things happen fast in moguls and you sometime lose control after a few turns. You probably haven’t notice, but I bet you don’t absorb moguls as good on one side. Why? Because it’s your weak side that has never practice absorbing as much as your good side. And landing jumps is a good way to learn just that.

This is just one example.

Practicing your weak side is not the end of the world, It’s just another perspective to keep in mind as you progress.

Don’t take your ability to ski for granted, don’t stop progressing, Don’t be lazy. And have fun on the mountains. That’s what telemark is all about.

See some moguls skiing here

Is telemark safe for your knees?

If I have knee problem,  can I telemark ski ? or is telemark safe for your knees.

I’m not a doctor.

But after 10 years of mountain rescue as a ski patroller in 4 different resorts, I certainly can tell you that telemark skiers are less prone to injuries. Here‘s somewhat of a proof. Ok it’s ski stats from Scotland, but still. It clearly shows telemark is less prone to injuries than any other snowsports. Their is a new research you can participate here

Is it because of the telemark gear or because of the people’s behavior? Again nothing scientific here but I’d say a bit of both…

Questions I’m often asked:

1. I have knees problems, will I be able to telemark?

Real honest answer is that I know more people that have quit alpine skiing and are now telemark skiing because of knee problems that the opposite. Telemark builds muscles around the knee and stabilizes the articulation. Also, when starting telemark, you will be less aggressive (probably) than you where on your skis or board. If you’ve never downhill before, telemark is a great way to approach the mountain at a friendly pace.

2. Are telemark binding safe?

“That’s true, there’s no release…

No binding system on the planet is 100% safe.

On most telemark bindings, there is no release. Old data found here tend to show that it’s safer with a telemark release binding than a non release binding. Although, equipment has continued to change a lot over the years, few brands have developed release bindings. The arrival of NTN bindings, a solid performing binding with release has not created a mass movement toward this product because of the release option. Don’t get me wrong, releasable binding is not bad, but it’s not a must.

The way your foot is attached and the way the binding moves, in most cases, a fall will not cause injury. And believe me, telemark skiers are reputed to fall a lot. If you want extra psychological support and have the release option, there’s a few out there, but other than the NTN, none are really on my list. Again, After years of telemark skiing and being around the community, I feel perfectly safe telemark skiing.

What is the most common injury when you alpine ski: knee ligaments (way up there) and is alpine skiing more prone to injuries, yes. So if you are alpine skiing and are concern about your knees, think about telemark as an option.

Is telemark skiing safe for your knees: definitely. Can accidents happen? Obviously every day, every where.

Go on and try it, telemark skiing is pure pleasure

Comfy telemark: Helmet, knee pads, socks and butt

2012-03-17 06.38.56

I’m a ski pratroller.

But even before hand, I’m a telemark skier who likes to ski hard. Day in and day out, I’m outdoor. And I like it. Here’s a list of things I wear to stay warm at all times.

Common tips are:

  • Make sure you don’t over dress to start your day,
  • don’t wear cotton,
  • use multilayer clothing system.

You can find dozen of web sites talking about those. Here are my best tips for keeping you warm:

  1. KNEE PADS: Safety is a concern. So I wear knee pads. I would not trade them for any reason now. When I started telemark skiing 17 years ago, I had leather boots and no cable on my bindings. The knee could easily touch the ground. Today’s equipment are much more rigid. To a point that it’s almost impossible for my knee to touch my ski. Still, I feel that my back leg knee is more expose and I still wear my knee pads. Working on the mountain, I still wear knee pads. It’s just so conformable. If your a snowboarder or an alpine skier, you should all be wearing be wearing knee pads. It keeps my knees warm. No joke. And it makes a world of difference.
  2. HELMET: An other smart choice for your safety, of course. But more than that, it’s just so comfortable if chosen right. Bring your goggles to the ski shop and try a bunch. Make sure it’s comfy on the head and for the ears, that it stays in place and that your goggles fit perfect, not leaving any gap around. Helmet is warm but not hot, It’s wind proof but most have vents, and most helmets now do not impair your hearing. Just a no-brainer.
  3. SOCKS: Feet are your link to your skis. Have good ski socks makes a good difference in comfort and in warm feet. Be careful, price doesn’t equal quality. My only choice is Patagonia mid weight ski socks. They are so durable and are unmatched in comfort. And I tried a lot of different models out there. I always have a second pair with me and change them at lunch because I have sweaty feet.
  4. BUTT: Well, if your in cold country, that is Canada for me, sitting on a chair lift is cold. I wear mid weight long johns under my ski pants. In the resort, I don’t wear Gore-Tex pants but rather light insulated ski pants. I add a fleece short for extra warmth. I usually buy a fleece pants that I cut just below the knees.
  5. GLOVES: Of all ski equipment, the glove is the one I like the most. Don’t ask me why, I just like it. For many years now, I always choose Black Diamond Guide gloves because of its warmth vs dexterity. A bonus is that their very durable, a must for a ski patroller ( I change every 2 years and I ski/work an average of 120 days a year). Whatever your preferences, gloves or mittens, make sure you get what you need to stay out. If they are leather, have them treated with a good specialized wax such as Nikwax or similar products. It will make them last longer.

BONUS TIP: If you have cold feet, you can always buy heated soles or foot warmer, but I don’t like either solutions. Heated soles are expansive and you always forget to charge them up. And foot warmer are single use (pollution), bulky and expensive after a while. But boot liners are relatively cheap. Every boots brand sell replacement liners, usually at 1/5th of the price of a boot. Buy an extra liner and change liners when changing your socks at lunch time. Guaranteed warm feet for the rest of your life. When re-selling your boots, you can have the buyer choosing his liner, it will be half as used. Keep the second liner for your new boots.

Enjoy winter, day in and day out.


Flawless method to learning movement, telemark skiing

Jonglerie

I can juggle five balls. And this blog is about telemark skiing.

I often meet people that are starting telemark skiing. One of the things I tell them is that they are very lucky to be beginners because they have so much to learn. The learning curve is fast and your milestones come every few days practicing. They then look at me, and go:

I’d like to be good now, ski the powder and rip through anything.

Goal is important but it is the mean that gets you coming back for more. It’s the fun part.

How to telemark then. I have a flawless method of learning movement. Skiing is just a combination of movements. So is juggling.

Ingredient one: get a tutorial method to learn the skill. Instructor, video, book… Anything. I learned juggling with a book that had all the 3 balls, 4 balls and 5 balls juggling tricks. Guess what, I can juggle 5 balls, not one more. Not because I can’t learn 6 and up. Just because I never got motivated in getting instruction for more. Make sure you have the tools to learn.

Ingredient two: Get a buddy as motivated as you. It will, in most cases, be the determinant factor to perseverance.

Ingredient three: Don’t wait to master a movement, try it on your weak side right now. We all have a weaker harm, a weaker kick leg, a weaker golf side. From juggling, I can tell you that you need both hands to catch and throw. Telemark is the same, you need to turn both ways. Practicing the weak side right away, you will master the skill FASTER on both sides. Spend a little more time on the weak side, and the good side will learn it in a flash.

Ingredient four: Don’t wait to master one skill before trying to do another one. Move on and come back. This will keep it fun.

Ingredient five: If you can’t do it instantly, don’t panic. You just need more practice. Keep it simple and make sure that you finish practicing that particular movement on a good note. your brain learns movement. It’s called proprioception. And it learns movement from resting in between practice session. I don’t know anybody that can juggle 5 balls the first time. Every time you come back at it, your brain have learned as assimilate more, and one day, it will just happen.

Bonus tip: Executing movement is more than an on/off switch. Learning is ongoing. Technique will always improve and future generations will always be better. I guess that’s why we can fly to outer space, or ski down climbing routes. Never take for granted that you know something, look around and learn from others.

Bonus Video:


Don’t hesitate to leave a comment!

And have fun…

Fall training: Five steps to fitness

There it is,

The leafs are turning yellow, orange, red and your heart beat is accelerating. You can’t wait for the first snow.

But wait.  Are you in top physical condition? Telemark is one of those sports that needs great general fitness and good muscles tone. Nothing comes free, so TRAIN.

I use to get by not training and It always got me 5 to 10 days in the season to feel good on my skis. At 30, it changed, and it took me 20 days. Ouch. Then, I started to train.

Here’s what you should do to get rippin’:

Step 1: Sit down and set 3 goals you want to achieve on snow this year. Get motivated. Not just a bit. You need to be willing to make the sacrifices.

Step 2: Determine your training potential. Be honest, but again, set yourself some goals. Will you train alone or with people. That’s one big key to success. Many of you have the inner voice dilemma: With people means going to sessions in the evening, ‘do I have the time?’ Alone means more freedom but will you stay motivated. In any way, finding a training buddy will help.

Step 3: TIME: When, how and how long will training take you. Get a program that you have time to do. Little is better than none.

TELEMARK TUTORIALS

Videos that will change the way you telemark

Step 4: Do it: Many training program can be found. Here’s few ideas:

  1. With People:
    1. Take a spinning class. Yeah I know, pushing pedals on a stationary bike in a dark room with disco music… not for everyone. Wrong. So many trainers have so many different styles. Call them, check out what they offer. Take the beginner class and rip! Make it once or twice a week.
    2. Take a plyometric training program in a gym. This is the way to really feel the difference and be coached doing it. Some gym have classes and other will build you a program. This is where you training buddy will really help you push your limits.


  2. By yourself:
    1. Do a few minutes exercise session. Here’s a video for a quick 3 min training routine. Fun but I find it insufficient for a complete preparation http://youtu.be/bjbiZdxowCc


  3.  2-3 weeks in, you feel great and want more? Do both, do it all. TRAIN.

Step 5: Stay motivated: Watch telemark movies, prepare your big winter trip; buy your season’s pass, check out the latest gear. Anything that reminds you that on that first day free heeling, you will be lapping runs easily, pain free, while your buddies wonder how you’re doing it.

Bonus tip: You don’t need to do all of that. Adapt your choices to your lifestyle and your goals. Again, little is better than none.

The Pachon or Lurk, old style telemark

chenal pachon

The pachon is the french name for the lurk,

In a trip last winter to Savoie, France, telemark legend Jean-Louis Chenal gave me a pachon.

I was honored and trilled to have this beautiful piece of art. The lurk is just a long wood stick used to balanced yourself and to propel the flats. It has been replaced in modern telemark skiing with two poles.The pachon was the Sheppard stick to gather the sheep. The fun part is that it was hollowed to be filled with genepy,the local alcohol. Mine is unfortunately not hollowed (yet).

The ski part is even more interesting. You can use a bamboo stick most ski resort have. If you ask a ski patroller, he will certainly lend you one.

Skiing with a long stick has lots of advantages and everybody should try it. First the balanced is truly easier. Second and most important, it allows the telemark skier to separate the upper and lower body. Having both hands on one stick will enhanced a lot of the good and the bad. At first, concentrate in having but hands facing downhill. Don’t worry if it’s not easy at first. As you turn, you can move the lurk as a kayak paddle, making the upper body move the opposite way you’re turning. That is if your moving your right leg forward for a left turn, you will be moving your kayak stroke right, bringing the left hand forward. Make sure you keep the stroke short or you will lose balanced after one or two turns. And make sure you bring the hand forward instead of pulling on the lurk, it helps keep your hands forward all the time.

This is a good exercise but it does not meet today’s performance of two poles. See it as a way to experienced upper body and lower body counter twist.